Creating Visual Timelines to help Clarify Project Roadmaps for a Construction Company
Goal: Create a graphic that organizes the project timelines into a simple timeline of events
The project manager was spending significant time on calls explaining the company’s project process and timeline to potential clients, many of whom did not move forward. She needed a clearer, more efficient way to communicate the early project stages. While each project varied, a consistent timeline existed within internal notes and documentation; so I extracted and formalized it into a visual guide. This not only streamlined client communication, but also gave the project manager a clearer reference to support internal workflow and consistency.
The Final Designs
-
![]()
Simplified Version
This final version became the most effective of the series, condensing complex information into a clear, easy-to-read visual. I used color blocking to distinguish each phase of the timeline and simple icons to improve scannability and visual engagement. While the finished graphic appears straightforward, it represents a significant process of gathering, organizing, and simplifying information that had previously been scattered and unclear in internal documentation.
-
![]()
More Complex Full Timeline Version
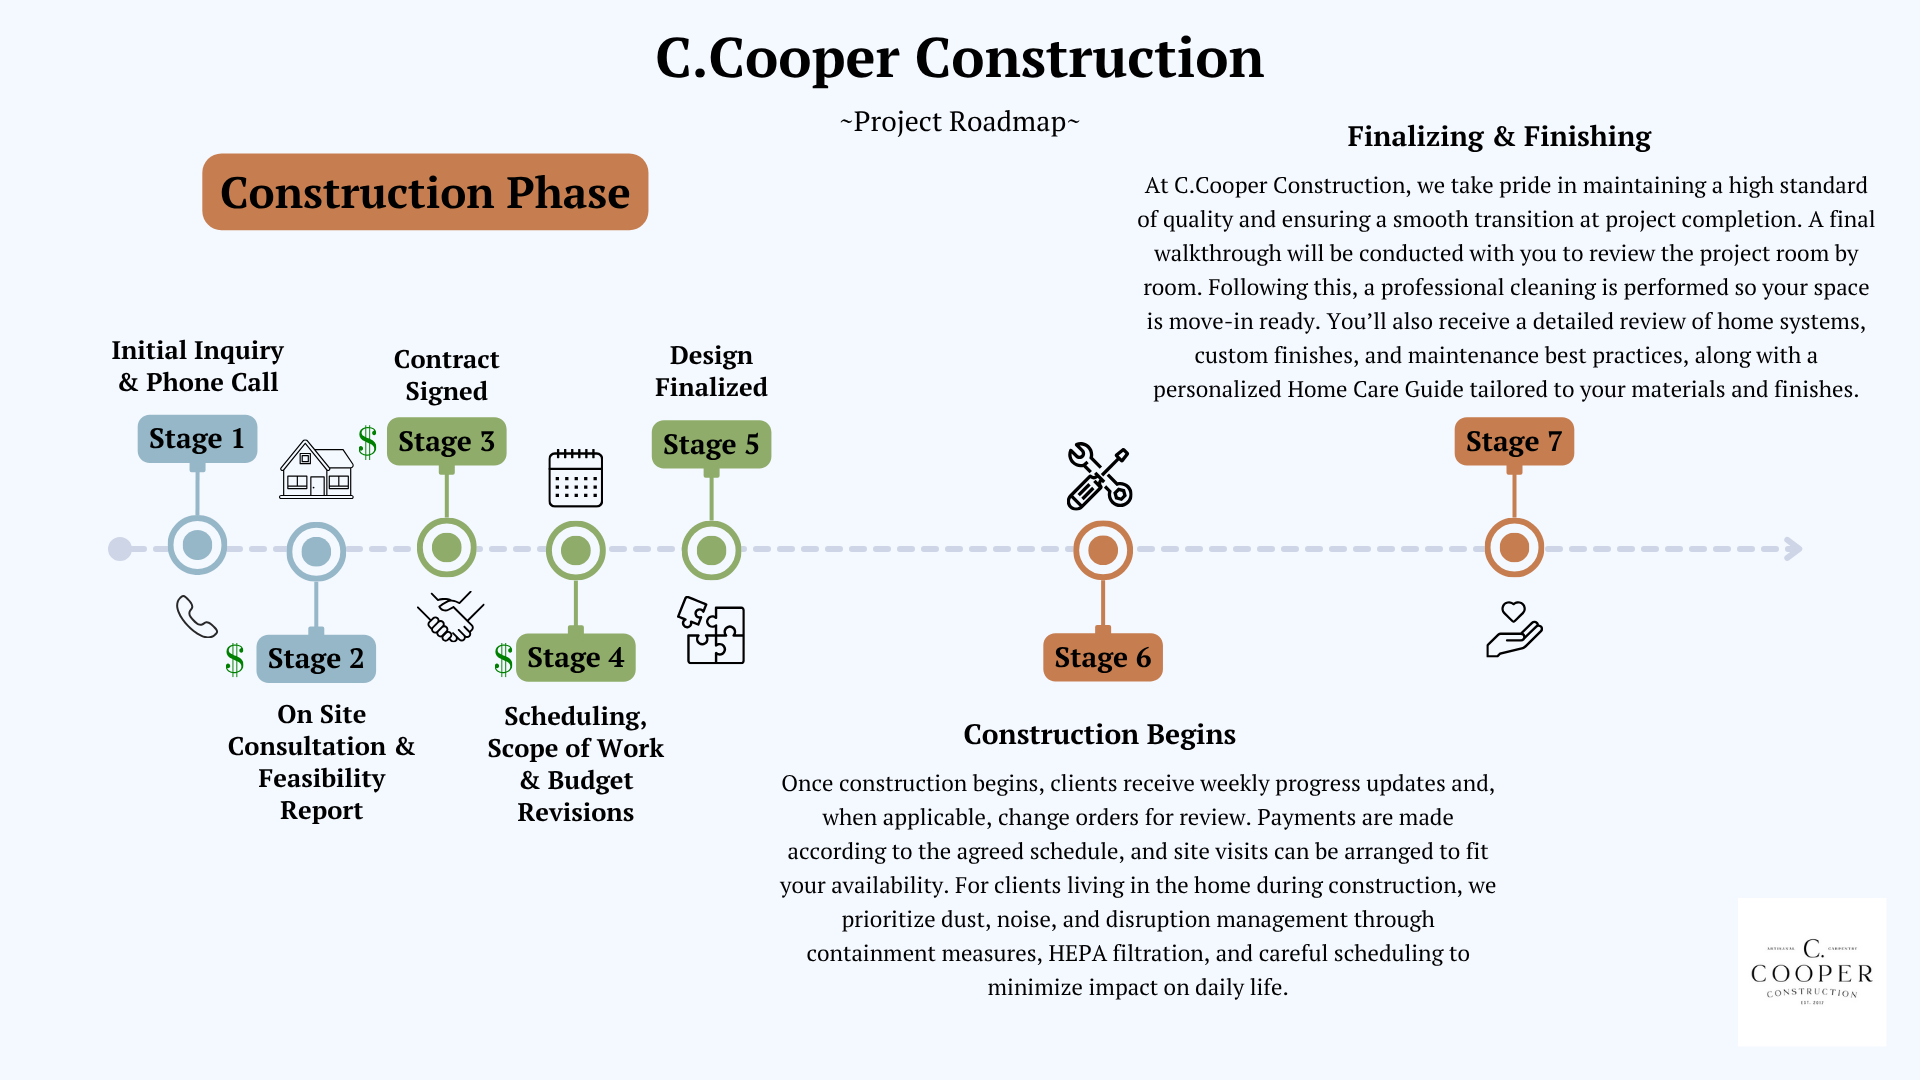
This version of the graphic includes more detail about each stage of the project process, providing clients with clearer expectations and context. It was also designed to be easily shared in email communications, with text that can be directly referenced or reused in client responses to streamline outreach.
-
![]()
Planning Phase
This graphic further expands the planning phase, breaking it into more detailed steps for improved clarity. As projects progress, the goal is to share updated timeline phases with clients in stages; providing relevant information when it’s most useful. This approach keeps communication clear and organized without overwhelming clients, helping them understand what’s coming next while knowing more detail will follow at the right time.
-
![]()
Pre-Construction Phase
Now we move on to the pre-construciton phase the project and what these stages will contain. Any area where money or payment is needed is indicated with a dollar sign and explained more in the text.
-
![]()
Construciton Phase
The final phase is expanded here as well. This stage is where projects begin to vary the most, as each is custom-tailored to the client’s unique needs. The goal of this graphic is to guide clients confidently to the point where work begins, ensuring they understand the path ahead while acknowledging that the details will become more personalized moving forward.


The Process
-
1. Gather Information
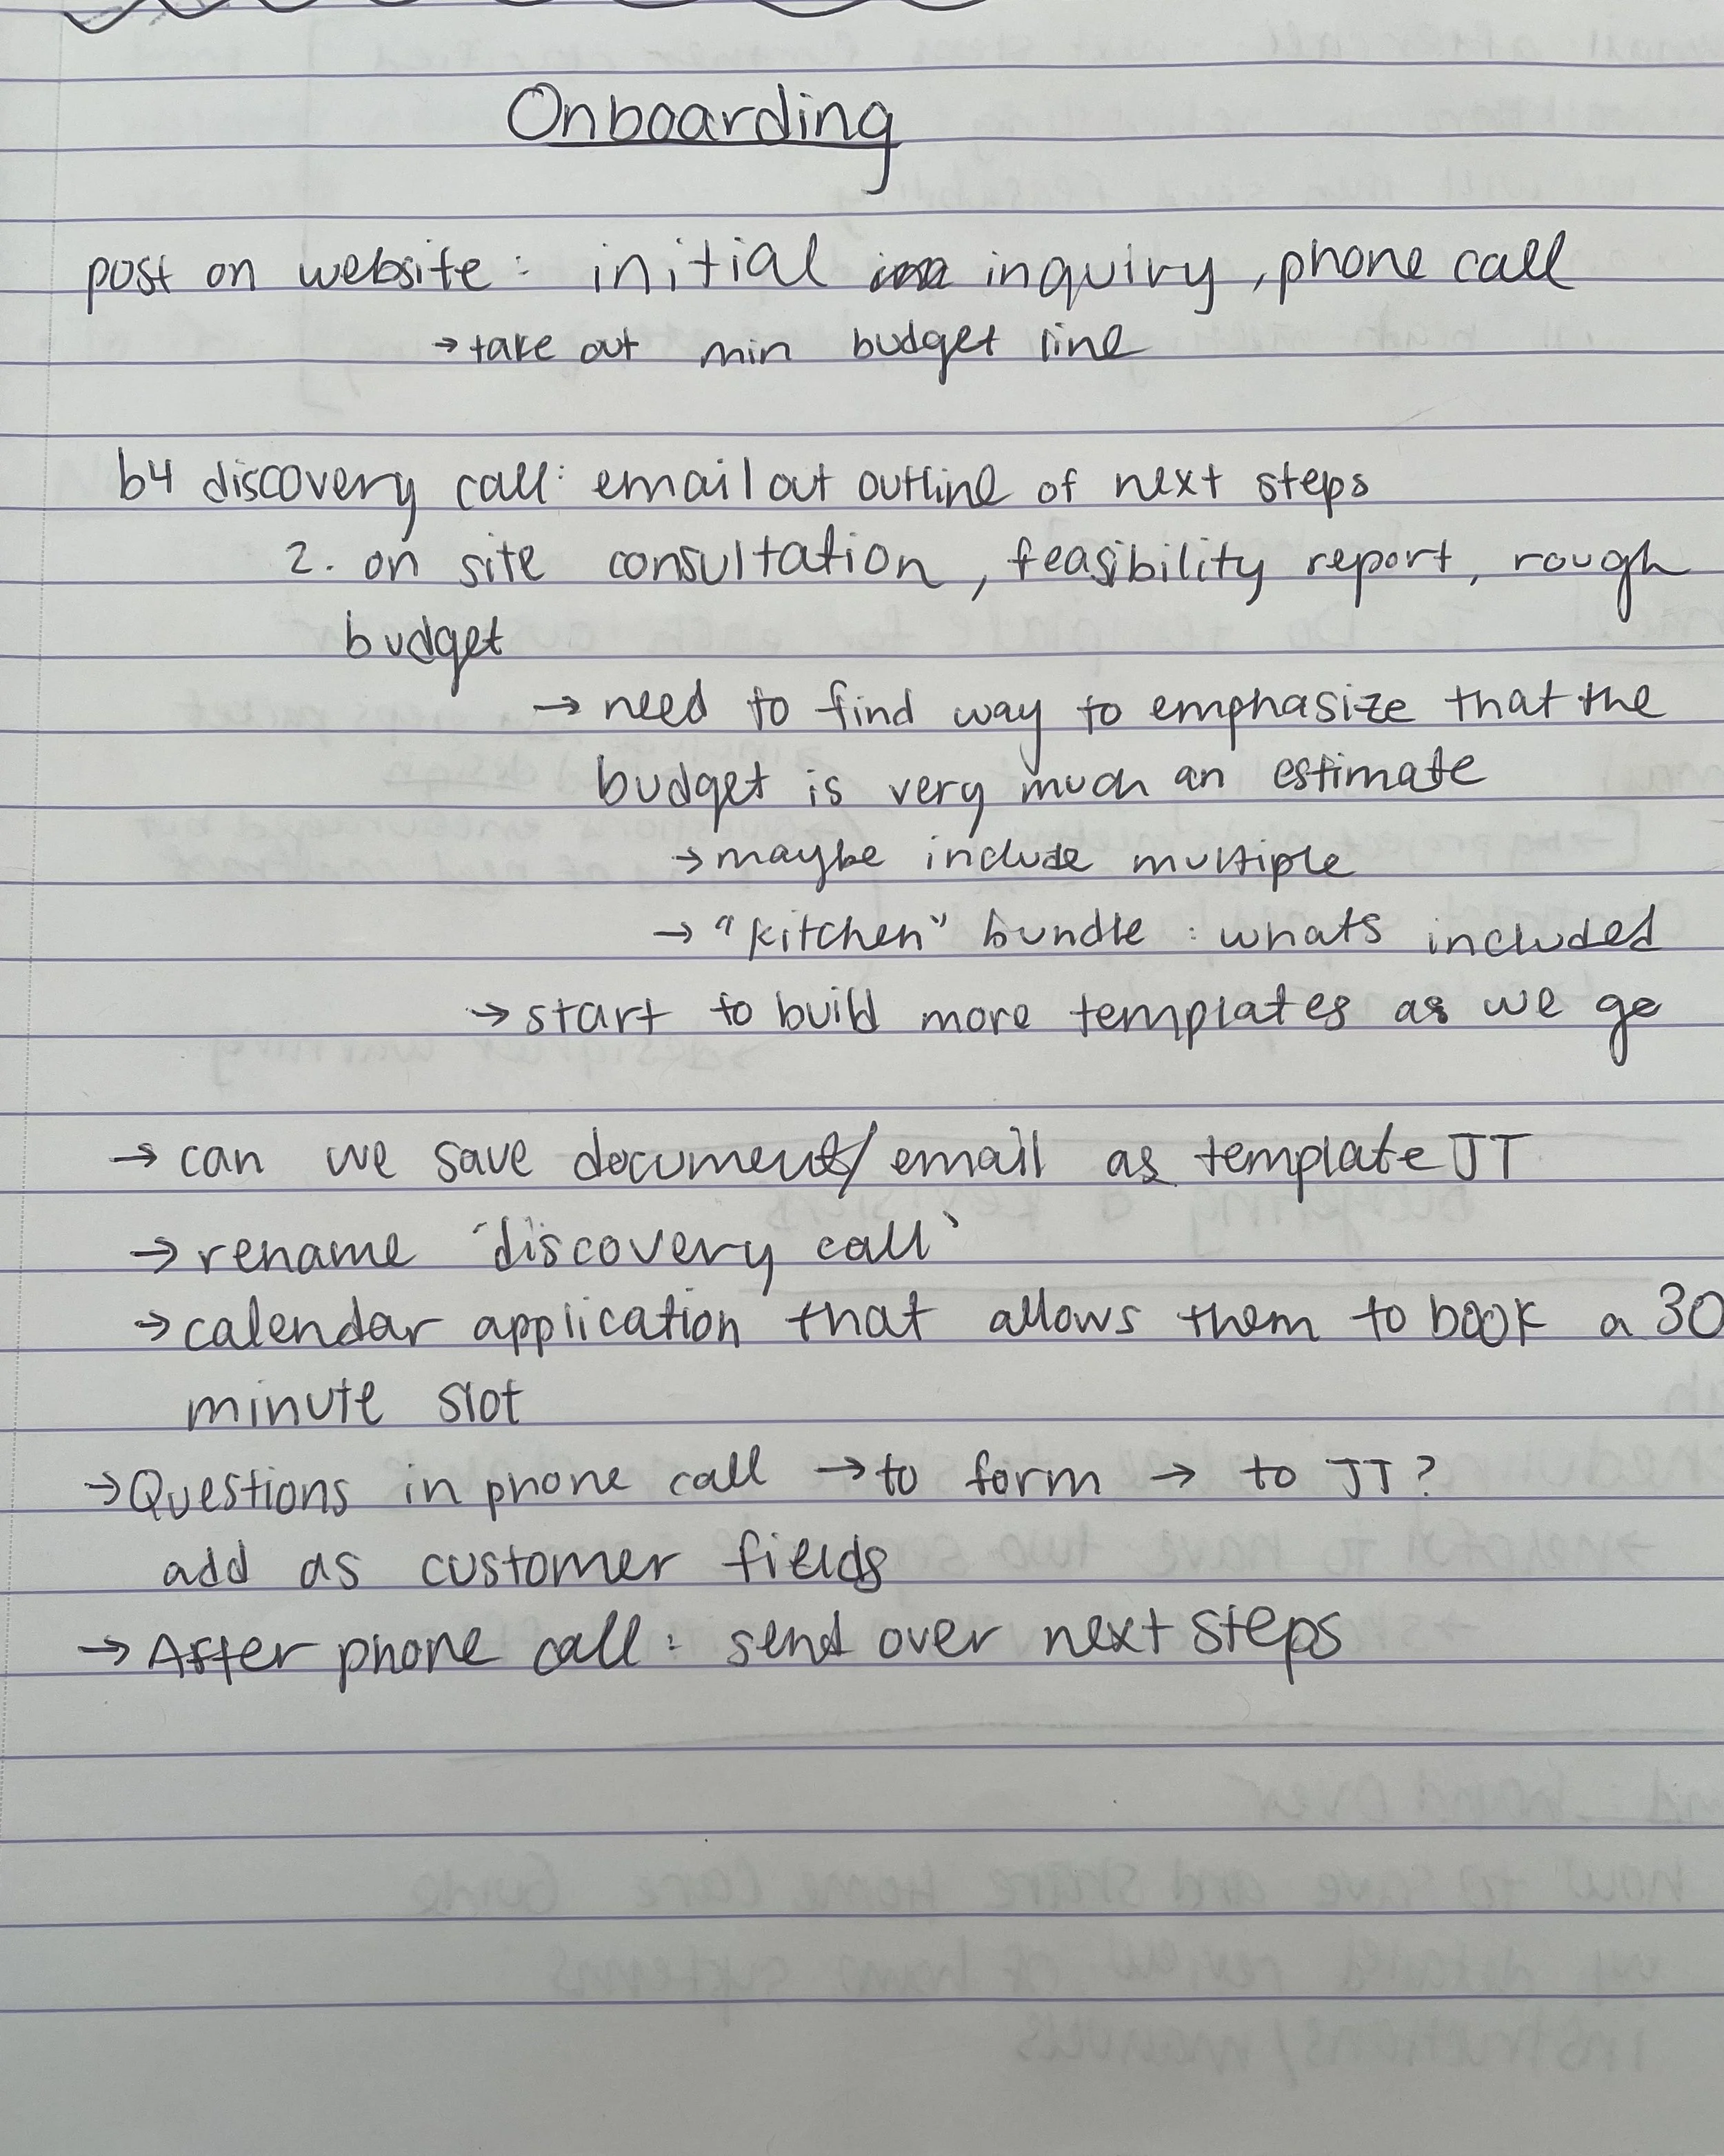
I met with the project manager to walk through the existing client onboarding process, documenting each step and key insight along the way. From these notes, I began organizing the information into clear structures and concepts that could later be translated into visual and strategic solutions.
-

2. Create a Rough Draft
Next, I explored different timeline layouts and visual approaches to best communicate the information. During this stage, I sketched concepts by hand and used a sketching app on my iPad, allowing me to quickly iterate and experiment with ideas.
-

3. Create a Mock-Up
At this stage, I brought my sketches into Canva to develop a digital mock-up. For this project, the final graphic remained close to the original mock-up, though the level of iteration always varies depending on client feedback and how quickly the design direction aligns.
-

4. Submit for Review/Testing
At this stage, I shared the design with the project manager for feedback and potential revisions. They were pleased with the overall direction but requested varying levels of detail to align with different project stages. This feedback led me to expand the project into a series of graphics, each tailored to specific phases of the client journey.
-

5. Make Changes based on Feedback
Returning to Canva, I developed multiple versions of the graphic with varying levels of detail, ensuring each stage delivered the right amount of information'; clear and informative without overwhelming the client.
-

6. Repeat steps 4 & 5 until Satisfied
From there, I continued refining the designs through feedback and iteration until the final graphic clearly communicated our intended goals. While the current version effectively serves its purpose, it remains flexible; open to future updates and adjustments as project needs evolve.